
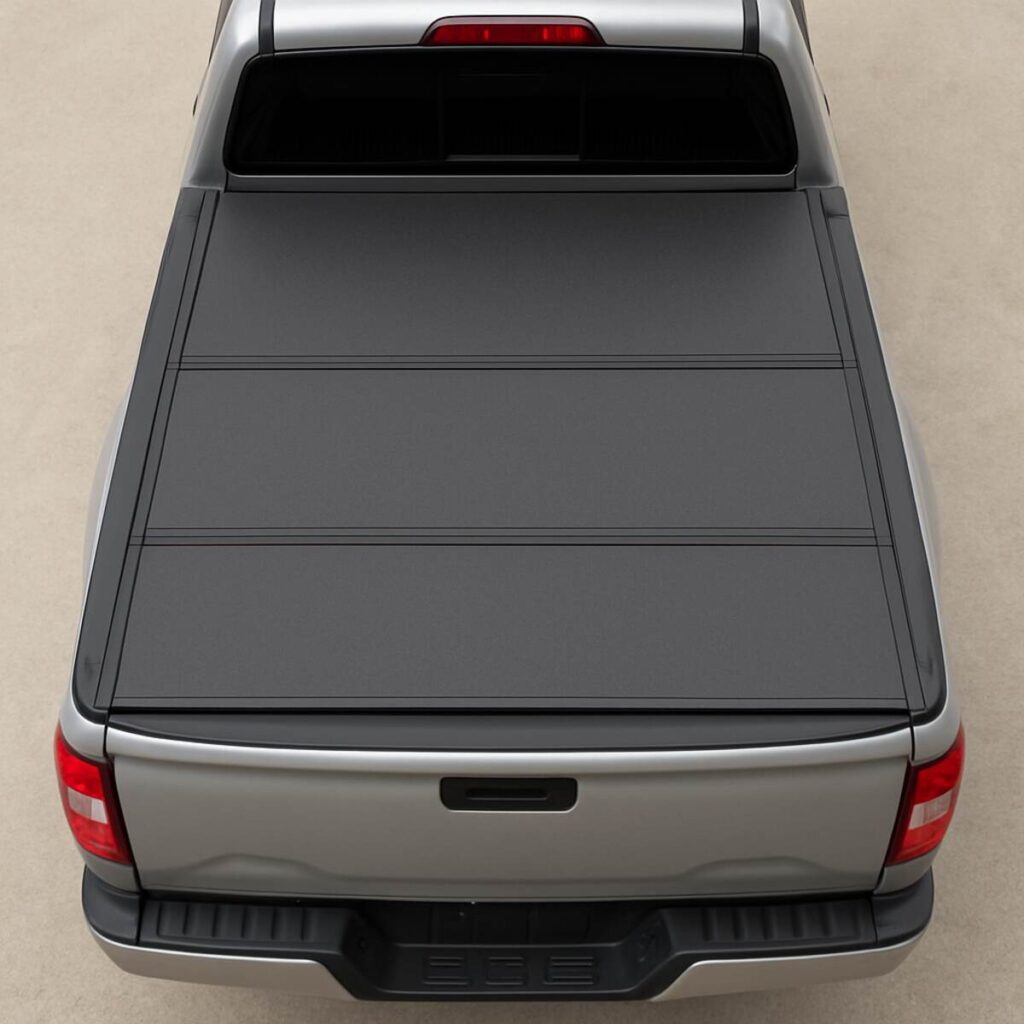
You don’t need a degree in mechanics or a shop full of power tools to secure your truck bed. That large box sitting in your driveway might look intimidating, but learning how to install a tri-fold tonneau cover is actually a straightforward project. In about 30 to 45 minutes—the time it takes to grab a coffee and clear out your tailgate—you can have this protective shield locked down and ready for the road. Find the best quad fold tonneau cover.
Think of this like putting a high-quality lid on your favorite storage bin—simple, satisfying, and highly effective. Modern designs rely on heavy-duty hand clamps rather than permanent modifications, meaning absolutely no drilling into your truck’s metal is required. Bypassing the dealership for this DIY installation keeps an extra $150 in your pocket while giving you total peace of mind that your camping gear or groceries will stay completely dry.
Adding a tonneau (a term simply meaning a protective truck bed cover) does more than just hide your cargo from plain sight. According to automotive industry data, an open truck bed acts like a giant parachute on the highway, catching air and pulling your vehicle backward. Sealing off that space creates fuel-drag reduction, allowing air to glide smoothly over the back and slightly improving your gas mileage on every road trip.
Before tearing into the cardboard packaging, take a quick look at the front wall of your truck bed directly behind the rear window, known as the bulkhead. This spot serves as the anchor point for the entire cover, acting as the foundation for a weatherproof seal. Aligning the front correctly ensures the back will latch perfectly, saving you from frustrating adjustments later.
A clear roadmap guarantees success right out of the gate, preventing halfway-through hiccups. Here is exactly what you will achieve today:
- Time Saved: A complete setup within a 30-minute window.
- Tools Required: Basic hand tools (often just a provided hex key or a 10mm wrench).
- The 3 Core Pillars: Perfect alignment, a watertight seal, and secure clamping to withstand highway speeds.
Your vulnerable cargo space is about to become a secure, weather-proof vault. Grab your keys, drop the tailgate, and let’s get that new cover out of the box and onto your truck rails.
Inventory Check: What’s Inside the Box and Why Every Part Matters
Pulling the cardboard off is satisfying, but before rushing to the truck, take a moment to inspect the main assembly. Look closely over the vinyl or aluminum panels for any stress marks, scratches, or dents caused during shipping. Catching transit damage now saves you the frustration of wrestling the heavy unit onto your bed only to realize it needs to be returned.
Next, empty that bag of tonneau cover hardware onto a clean towel so pieces don’t roll away. You need to verify you have the “Big Four” components before removing any existing truck accessories:
- The Cover Assembly: The folded panels themselves.
- Clamp Handles & T-Bolts: These metal T-bolts slide directly into the cover’s aluminum frame, acting as the essential anchor points for your clamps.
- Weather Stripping Roll: Extra foam tape used to seal the gap near your cab.
- Safety Straps & Buckles: Heavy-duty nylon components mounted at the front.
These specific components work together to keep your gear completely safe at highway speeds. While the T-bolts and clamps pull the cover tight against the metal rails to keep rain out, the buckle straps serve a totally different purpose. They lock the folded panels firmly together, acting as your primary defense against the wind catching the cover when hauling oversized items like a new grill.
After confirming all these truck bed cover parts are present and undamaged, the real work begins. However, clamping a brand-new weather seal over a layer of driveway dust guarantees water leaks. Before lifting anything heavy, it is time to prep your bed rails for a lifetime seal.
Pre-Install Hygiene: Prepping Your Bed Rails for a Lifetime Seal
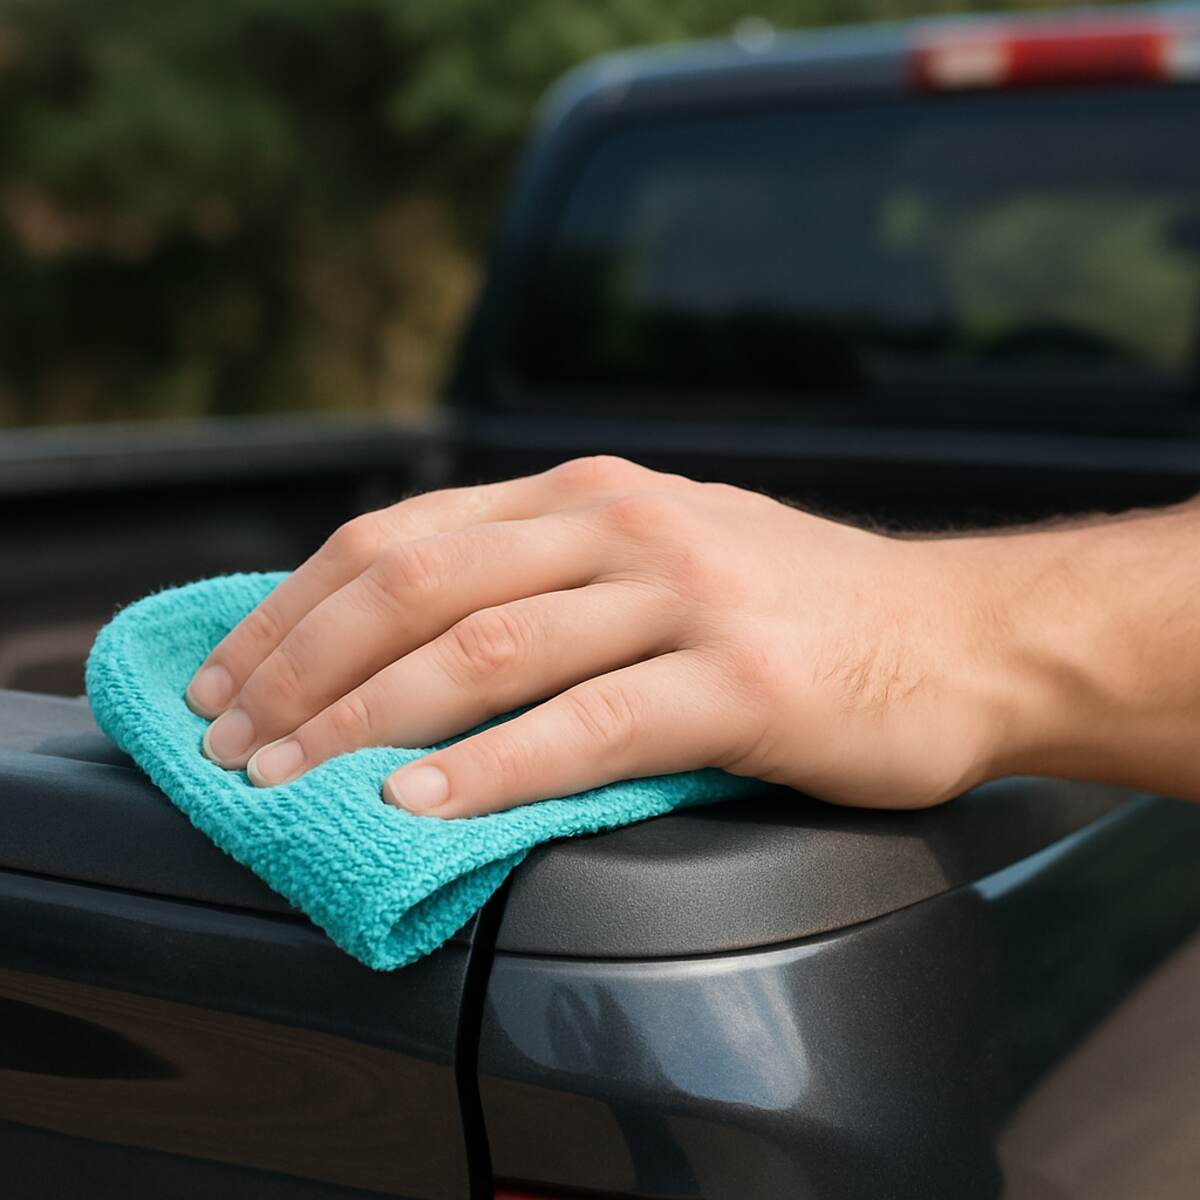
Grabbing a rag and wiping down your truck might feel like an unnecessary chore when you are eager to get your new cover mounted. However, skipping this crucial truck bed rail cleaning is the number one reason new installations leak within the first few weeks. Road grime, fine driveway dust, and old car wax act like an invisible barrier that completely ruins the adhesive bond of your weather seals.
Standard car soap simply will not cut it for proper tonneau cover prep. Most automotive soaps contain gloss enhancers or waxes designed to make paint shine, but those same ingredients leave a slick residue that makes foam tape peel right off. Instead, use rubbing alcohol on a clean cloth to strip the surface down, creating the perfect dry canvas for adhesive bonding—the firm, permanent stick that keeps your seals glued down at highway speeds.
Pay special attention to the texture of your truck’s edges as you scrub. Many modern trucks feature factory plastic bed caps that trap microscopic dirt deep in their grooves. You need to apply firm pressure along these side rails and across the bulkhead rail, which is the flat ledge directly behind your rear window. Scrubbing these areas until your cloth comes away clean ensures any weather stripping application guide you follow will actually result in a watertight seal.
A perfectly prepped surface guarantees your gear stays dry even when driving through a torrential downpour or a high-pressure car wash. Once that ledge is squeaky clean and fully dry, you are ready to tackle the foundation of your entire installation.
The Bulkhead Blueprint: Bridging the Gap Between Cab and Bed
Hoisting that heavy, folded cover out of the driveway and onto your truck bed might feel like a wrestling match, but this initial placement builds your foundation. The front wall of your truck bed resting right behind your rear window is the bulkhead, serving as the absolute anchor point for your setup. Getting this spot right is the only way to ensure reliable pick-up truck bulkhead protection against shifting cargo and harsh weather.
You must secure this cab side first, a non-negotiable requirement known as the “Front-Heavy” rule. Think of your tri-fold cover like a standard household door; if the top hinge is mounted slightly crooked, the bottom will inevitably scrape the frame or refuse to latch. By establishing a properly squared anchor at the front, you guarantee the remaining panels will unfold in a perfectly straight path toward your tailgate.
The secret to perfect tonneau cover positioning simply involves finding your center line. While the cover is still fully folded and resting over the bulkhead, physically nudge the entire unit left or right until it sits evenly across the width of the bed space. You do not need a tape measure for this step, because your eyes are surprisingly accurate at judging these broad spaces during a dry fit.
To dial in your exact truck bed rail alignment, rely on a builder’s trick known as “The Reveal.” Look down the sides where the cover overlaps your truck’s edges and check to see if an equal sliver of the plastic rail is visible on both the driver and passenger sides. Just like ensuring a photograph sits uniformly within a picture frame, matching this exposed border guarantees your hardware is perfectly squared.
Once that exposed reveal matches evenly on both sides, resist the urge to immediately lock down the clamps with maximum force. Before you permanently bolt your newly aligned cover into place, you have to address the microscopic gaps between the metal and the rubber. The next step is creating a watertight barrier at the bulkhead.
Weather Stripping 101: Creating a Watertight Barrier at the Bulkhead
Nobody wants to unpack camping gear only to find it soaked from a sudden rainstorm. Since the front of your truck bed faces the brunt of driving wind, figuring out how to seal tonneau cover for rain at this exact spot is crucial. That perfectly aligned bulkhead you just established needs a watertight barrier before you bolt anything down permanently.
To stop water in its tracks, your kit includes a thick adhesive foam roll called a compression seal. If a plastic bed liner creates an uneven step-down at the front wall, you must first apply a bulkhead gap shim. Think of this shim as a leveling block; it builds the front wall up to match your side rails’ height, giving the main seal a completely flat foundation.
Following a reliable weather stripping application guide comes down to three essential practices:
- Temperature Check: Apply the adhesive when it is above 60°F outside so the glue bonds permanently to the metal.
- Even Tension: Roll the strip out in one continuous line without stretching it, which prevents the foam from shrinking and pulling back later.
- Corner Overlap: Run the seal slightly past the inside corners of the bed rails to block the most notorious leak spots.
Lowering the heavy cover onto this fresh foam introduces the “Compression Zone.” This is the sweet spot where the rubber squishes down enough to block water, but not so hard that it crushes completely flat. Closing gaps at the bulkhead requires a gentle touch; clamping down too aggressively causes the seal to “roll” or twist out of place, instantly breaking your carefully crafted barrier.
Because that rubber must compress evenly, resisting the urge to crank down your hardware right away is your smartest move. You must verify the cover sits perfectly flat across your new seal before the wrenches come out. This makes a dry fit strategy essential.
The ‘Dry Fit’ Strategy: Why You Should Never Tighten First
Placing the perfect weather seal feels like a major victory, making it incredibly tempting to immediately lock down those front bolts. However, securing the hardware right now almost guarantees you will end up redoing your work. Instead, you need to perform a “dry fit” by resting the folded cover against the bulkhead and gently unfolding it all the way to the tailgate without tightening a single clamp.
Checking your tonneau cover alignment in this unfastened state lets you visualize the final look before anything becomes permanent. As you walk around the truck, verify that the rubber side seals are resting squarely across your plastic bed caps. Whether you are dealing with a sleek flush mount vs top mount fitting, the sides must run perfectly parallel to the rails to block rain effectively.
The most critical part of this visual inspection happens at the rear of the truck. If the assembly sits too far back, you will experience the “Tailgate Jam,” where the heavy door refuses to close or violently strikes the aluminum frame. While measuring truck bed for proper fitment before buying gets you the right size, you must now slide the unbolted unit slightly forward or backward until you achieve perfect tailgate clearance.
Once you confirm the spacing is completely even across all four edges, gently fold the panels back up toward the cab. You now know exactly where the frame must sit to keep your cargo secure and dry. With the positioning officially finalized, your next step is securing the front without stripping threads.
Clamping Down: How to Secure the Front Without Stripping Threads
With your alignment locked in during the dry fit, the next crucial phase is anchoring the assembly to your truck. The front section acts as the foundational anchor for the rest of the system. If this connection shifts, the entire cover shifts with it, making a solid hold at the bulkhead absolutely essential.
Reaching under that first panel, you will feel the underside of your truck’s bed sides. First-timers often make the frustrating mistake of attaching their mounting hardware exclusively to the plastic bed rail cap. Plastic flexes and warps under pressure, so you must feel slightly further inward to locate the rigid, structural metal rail lip.
To position the mechanism correctly, slide the jaws of the tonneau cover clamps entirely up and over that inner metal edge. The hardware must sit completely flush against the bare steel or aluminum. Think of it like gripping a heavy textbook; grabbing just the slippery dust jacket will eventually result in a dropped book, but pinching the hardcover gives you absolute control.
Applying the right amount of fastening force is where finesse meets mechanics. Spin the bolt until it is firmly finger-tight against the bracket, then grab your wrench for exactly one full rotation—the “Finger-Tight plus 360 degrees” rule. When securing the hardware, this simple guideline creates the perfect clamping torque, firmly compressing the weather seals without bending your truck’s metal or stripping the bolt threads.
Give the front panel a firm tug upward to confirm it feels as solid as the truck bed itself. There should be absolutely no wiggle, clunking, or daylight visible underneath the seal. With your foundation securely bolted down, you are ready to flip the remaining panels backward and check your hinges for smooth operation.
The Unfold Test: Checking Your Hinges for Smooth Operation
Now that your front foundation is locked down, it is time to walk your tri-fold tonneau cover back toward the tailgate. Unfolding the panels is your best opportunity to spot minor alignment issues early. As you flip each section over, watch how the edges drop. They should nest squarely between the truck’s side rails like perfectly sized puzzle pieces.
Temperature plays a huge role during this step. Cold weather shrinks the vinyl material, making the cover feel stubbornly tight, while a warm day allows the fabric to stretch naturally. Before dropping the panels flat, tuck the buckle straps safely away so they don’t get pinched between the heavy panels.
Pay close attention to the mechanical joints to avoid hinge binding, where the heavy panels feel physically stuck or resist folding. A minor tonneau hinge adjustment usually fixes this friction, but first, run through this Hinge Health Checklist:
- No popping sounds
- Side-seals remaining flat
- Hinges sitting flush against the rails
Finally, run your hand along the outer edges to ensure the weather seals haven’t rolled underneath themselves during the unfold. A folded rubber seal creates an instant pathway for rainwater to soak your cargo. Once the cover lays completely flat and the rubber edges look smooth, you are perfectly positioned for securing the rear.
Tailgate Latching: Securing the Rear for Highway Speeds
Reaching the tailgate puts you at the finish line, but this final connection dictates your truck’s aerodynamics. While the front bulkhead acts as an anchor, the rear prevents the newly unfolded panels from catching air. Most setups use quick-release tonneau rear latches that make daily bed access completely effortless while holding everything safely down on the highway.
Getting that perfect holding grip requires mastering pull-down force. Inside those latch assemblies, a vertical threaded rod controls the actual tension. Spinning this rod dictates the physical resistance to pull the cover tighter against the bed rails. You want the force firm enough to gently compress the rubber seals—similar to latching a heavy-duty cooler—without turning the closing process into a frustrating wrestling match.
Once the tension feels right, pull the handle down to hook under the bed’s inner lip or the provided strike plates. Strike plates are simple metal brackets offering the clamp a perfectly flat, solid shelf to bite into if your plastic bed caps are too thick. As you press the handle home, feel for a solid locking click guaranteeing the mechanical jaws are fully engaged.
Closing order matters immensely for the weather stripping at the back edge. Always lock the cover down before shutting your tailgate. This specific sequence acts as one of the crucial tailgate seal installation steps, allowing the heavy tailgate to pinch the rear rubber flap tightly against the metal instead of awkwardly folding it underneath the latches.
Give the back corner a firm upward tug to verify the clamps are holding their ground. If the panel lifts away from the truck, simply unlatch it and spin those threaded rods tighter. With the tailgate securely locked, you are ready to perfect the overall fit and stop wind flap.
Tension Tuning: How to Stop Your Cover from Flapping in the Wind
Cruising down the highway with secured rear latches should feel victorious, but a loose cover quickly ruins the drive. When air rushes over the truck bed at 65 miles per hour, relaxed vinyl catches the wind and creates a rapid, drumming noise known as harmonic vibration. This isn’t just an annoying sound echoing through your cab; it actively indicates that the fabric is absorbing damaging aerodynamic stress.
Spotting the physical causes of tonneau cover flapping requires a quick visual inspection before you even hit the road. Look closely at the material stretching between the aluminum frames. If you notice sagging, water pooling in the center, or deep ripples along the edges, the surface lacks necessary tightness. Catching these signs early is the secret to troubleshooting rattling truck bed covers before constant buffeting wears out the hardware.
To eliminate this slack, locate the small tension dials built directly into the rear locking blocks. Twisting these threaded wheels means adjusting tri-fold tension clamps to physically pull the tarp tighter across the skeletal frame. You want to dial in the resistance until the top feels completely drum-tight when you tap it with your hand, ensuring rain bounces off and wind glides smoothly over the surface.
Remember that vinyl expands in the summer heat and shrinks during winter freezes, making a basic seasonal adjustment schedule essential. Simply give the dials a quarter-turn tighter in July and loosen them slightly in December to prevent over-stretching the material. With your tension perfectly calibrated for the weather, you must also account for bed liner compatibility.
Bed Liner Complications: Installing Over Drop-ins vs. Spray-ons
Opening your tailgate to find a thick protective coating is great for hauling, but it physically changes how your cover attaches. Ensuring proper truck bed liner compatibility is the difference between a snug, watertight fit and a frustrating, persistent leak.
Spray-on bed liners are fantastic for durability, yet their rough, sandpaper-like texture sometimes prevents rubber weather seals from sitting perfectly flush. To achieve a watertight seal, apply an extra strip of foam weather-stripping directly over the textured bulkhead at the front of the bed. Because you are using no-drill tonneau cover mounting hardware, this secondary foam simply compresses into the tiny high-and-low gaps without requiring any permanent modifications to your truck.
When working with pre-molded plastic drop-ins, the shape of the shell dictates your next move. “Under-the-rail” styles are incredibly DIY-friendly because they leave the underside of the metal ledge completely exposed for a solid grip. However, when securing a tonneau cover with drop-in liner that wraps tightly over the bed edges, the plastic blocks your crucial rail lip accessibility.
To safely bypass these thick plastic walls without damaging your truck bed, keep these specific compatibility tips in mind:
- Notching the plastic: Carefully slice small squares in the plastic lip with a utility knife so the clamp’s metal jaws bite bare steel, rather than squeezing slippery plastic.
- Using ‘Clamp Spacers’: Insert these small blocks behind the metal ledge if the plastic wall pushes the clamp outward, ensuring your hardware stays perfectly vertical.
- Checking for bulkhead-cap thickness: Verify the thick plastic overlapping the front wall doesn’t unexpectedly raise the cover and create a latching gap at the tailgate.
Once your foundation is prepped and the clamps can securely grip the actual metal framework, you are ready to lock the panels down. The style of folding panels you purchased will dictate your final tightening sequence.
Hard vs. Soft Tri-Folds: Key Differences in Mounting Hardware
Choosing between a vinyl and a solid composite cover changes more than just the look of your truck. The hard vs soft tri-fold installation difficulty ultimately comes down to the weight of the materials and the complexity of the hardware keeping them safely secured.
Traditional vinyl covers are incredibly light and rely on simple hand-tightened clamps. In contrast, hoisting an aluminum tri-fold cover onto your bed rails requires a bit more muscle and a sturdier track-mounting system. Because solid panels do not stretch like fabric, their metal tracks must be perfectly parallel to guide the folding action smoothly.
When upgrading to these rigid setups, you will encounter a few specialized hardware pieces designed to handle the extra bulk and channel away rain:
- Higher weight capacity: The heavy-duty tracks are engineered to support 300+ lbs of evenly distributed weight across the top panels.
- Water management: These setups use tonneau cover drain tubes to actively redirect water out of the metal side rails.
- Slam-latches: These are spring-loaded locking mechanisms that click into place automatically—just like a car door—rather than requiring manual clamping underneath.
Those flexible hoses are actually much easier to install than they look. Just search near the front bulkhead of your truck bed for small, oval plastic “knock-out” plugs. Pop them out with a flathead screwdriver, and push the tubing through so trapped water drips harmlessly onto the pavement. Also, remember to give those complex slam-latches a quick spray of dry lubricant seasonally to prevent them from sticking.
Even with perfect hardware alignment and properly routed hoses, water is notoriously stubborn. If you notice a rogue puddle near the cab after a heavy rainstorm, it is time to grab some extra weather stripping and move on to fixing corner leaks.
Troubleshooting Gaps: Fixing Leaks at the Corners
Expecting your truck bed to stay as dry as a submarine is tempting, but the realistic goal for any folding cover is about 98 percent water resistance. Modern truck beds feature subtle curves and textured plastic caps that make a perfect factory seal tricky right out of the box. Most water intrusion actually happens right behind the cab, making weatherproofing that specific spot your top priority.
You do not need to wait for a thunderstorm to find these hidden gaps. The easiest diagnostic method is the “Flashlight Test,” which uses natural daylight as your guide. Simply crawl inside the truck bed on a bright afternoon, have a helper close the tailgate, and look toward the front corners. Any spots where daylight peeks through will instantly highlight your tonneau cover corner leaks.
The secret to blocking those tiny pinholes of light is using EPDM foam shims. These are dense, adhesive weather-strips often included right in your hardware kit. Think of them like custom-fit gaskets; just peel the backing and press them firmly where the side rails meet the front wall. Sealing the cover against rain simply means layering these small foam blocks to fill those specific, uneven corners.
While the front bulkhead is notorious for letting in rain, the rear tailgate gap is the biggest culprit for sucking in highway dust. Adding an optional aftermarket tailgate seal creates a truly protected vault for your gear. With weatherproofing complete, you must ensure the heavy cover stays locked down when folded open.
Safety First: Routing and Securing the Buckle Straps
Driving with an open bed is incredibly convenient for hauling oversized gear, but it drastically changes how air moves over your vehicle. An unfastened cover acts exactly like a rigid parachute on the highway, catching wind through a powerful upward force called aerodynamic lift. If the folded panels are left loose, that massive wind pressure will violently snap the hinges back, causing severe damage to both the frame and your truck cab.
Locking those panels safely against the bulkhead requires proper engagement of your tonneau cover buckles. Always use the simple “Two-Click” rule: push the clip in until you hear the first click, then give it a firm tug to ensure it seats fully into a locked position. You must also engage both straps whenever driving open, as relying on just one side pulls the aluminum frame off-center and causes permanent warping over time.
Those nylon belts still require your attention even when your bed is fully closed and sealed. Proper folding bed cover safety strap placement means snapping the loose male ends into their designated storage clips underneath the panels before dropping your tailgate. Leaving them dangling allows highway winds to whip the heavy plastic against your paint job, creating an obnoxious rattle right behind your headrest.
Mastering strap tension is the final step in securing truck bed cover systems safely. The lines must be snug enough to prevent the folded panels from bouncing, but not so tight that the plastic buckles bow under the stress. With your safety straps properly adjusted and stowed, you can now verify your entire clamping setup.
The Post-Install Stress Test: Validating Your Work
Closing the tailgate on a newly installed cover feels like a major victory, but your work isn’t completely finished just yet. Before you pack the bed with expensive gear or hit the freeway, you need to verify that everything is properly aligned and securely locked down.
To guarantee your cargo stays safe and your panels stay put, you should perform a routine tonneau cover safety check. Just execute these three final tests:
- The Hose Test
- The Highway Tug
- The Tailgate Slam
Grab your garden hose to simulate a heavy rainstorm. Spray a steady shower over the roof of your cab so the water cascades naturally down the rear window and over the bed cover. Open the tailgate and peek inside for a practical tonneau cover leak test; a few stray drops near the corners are completely normal, but if you see puddles forming, your rubber weather seals are likely pinched and need readjusting.
Vibrations from regular driving will often cause your newly tightened hardware to shift and settle into place. Take your truck for a quick ten-minute drive, then perform “The Highway Tug” by firmly pulling upward on the side frames to see if anything gives. If you notice any upward movement, tightening the tension bolts by one half-turn is the fastest method for stopping unwanted vibration.
Modern trucks come packed with technology, so your last step is verifying nothing gets blocked during “The Tailgate Slam.” Drop and raise your tailgate a few times to confirm the cover’s rear edge doesn’t obscure your backup camera, trigger false rear-sensor warnings, or force you to slam the metal to get the latch to catch. Once everything clears smoothly, you are ready to master the simple upkeep routines to protect your investment.
Maintenance Secrets: Keeping Your Tri-Fold Functioning for Years
Your newly installed cover lives in a harsh environment, battling extreme temperatures and constant highway crosswinds. Make tonneau cover maintenance a habit by implementing a “Quarterly Re-Tighten” schedule. Every three months, simply grab a wrench and double-check your mounting clamps. Road vibrations inevitably loosen hardware over time, so a quick physical inspection ensures your setup remains firmly anchored and completely secure.
Sunlight poses a very different threat through a process called UV embrittlement. When the sun constantly bakes unprotected vinyl, the fabric loses its natural oils, eventually turning stiff and prone to cracking like an old rubber band. Proper truck bed cover cleaning combined with dedicated UV protection for vinyl tonneau covers prevents this premature aging. Gently wash the surface with mild car soap, then apply a water-based protectant to keep the material supple, catching early sun damage long before irreversible tears develop.
Keeping the folding mechanism smooth requires hinge attention, but choosing the right spray is critical. While you might initially reach for a standard silicone spray, silicone stays wet and acts like a strong magnet for abrasive road dust. Instead, use a PTFE lubricant, commonly known as Teflon. PTFE dries completely slick, preventing annoying metal-on-metal hinge squeaks without creating a messy, dirt-trapping paste inside your truck bed.
This simple seasonal upkeep routine guarantees your hardware survives the elements without rusting or failing. A well-cared-for setup does more than just look great in the driveway; it actively protects your wallet. Once the mechanics are dialed in and your panels are shielded from the elements, you can easily transition into maximizing the return on your investment.
Long-Term Value: Fuel Savings and Cargo Security
All that wrenching pays off the moment you hit the highway. Without a lid, wind catches your open tailgate like a parachute, creating “bed drag” that forces your engine to work considerably harder. Capping that open space completely streamlines your truck, improving tonneau cover fuel economy by roughly 5 to 10 percent during those long, high-speed trips.
These tri-fold tonneau cover benefits quickly add up over time. Consider the real-world return on your investment:
- Gas savings: Saving 5% at the pump naturally offsets the cover’s initial price tag over a few years of normal driving.
- Cargo loss prevention: Keeping gear completely dry prevents expensive weather damage to power tools, groceries, or camping luggage.
- Resale value: Shielding your factory bed paint from harsh UV rays and debris boosts your future trade-in value.
True truck bed security relies on preventing a “crime of opportunity”—when someone snatches valuables simply because they are easily visible and accessible. A heavy-duty cover acts as an “out of sight, out of mind” visual barrier. Because these covers latch securely from the inside, pairing them with a locked tailgate creates an effective protective vault. You trade a few seconds of instant bed accessibility for absolute peace of mind while parked outside the hardware store.
Knowing your gear is securely hidden and your gas mileage is optimized makes the installation effort entirely worthwhile. Before testing these practical perks on your next road trip, verify your setup with a final inspection.
Ready for the Road: Your 5-Minute Final Inspection Checklist
That big box sitting in your driveway has officially transformed from an intimidating chore into a secure shield. You now know exactly how to install a tri-fold tonneau cover without paying a shop to do it for you.
Before taking your completed DIY truck project out on the road, you need to step back and do a quick review. This simple routine prevents high-speed vibrations and guarantees your cargo stays fully protected.
Use this truck bed cover installation summary to perform the Final 6-Point Inspection:
- Front clamps
- Buckle straps
- Tailgate latch
- Weather seal alignment
- Side rail centering
- Tension check
Verify all 6 critical points are tightened before the first highway trip, then ensure the tailgate opens and closes without catching on the rear seal. Listen closely for the “Thud Test”—a firm, muffled sound when closing the tailgate means your alignment is absolutely perfect.
Take pride in a professional-grade installation completed in under an hour. Your gear is dry, your truck looks sharp, and you did it all yourself.